Showing posts with label How to. Show all posts

Tuesday, 22 November 2016

How to clean Vazhaipoo / How to clean Plaintain flower

How to clean Vazhaipoo / How to clean Plaintain flower:

Cleaning or vazhaipoo is the main thing in doing vazhaipoo recipes. I have heard many of them wont do this recipe since because of this cleaning.
                It is really easy to clean this flower. This flower has many health benefits such as it is good for kidney stones , reduces menstrual bleeding and also has a rich source of vitamin A,C and E and minerals also contain potassium and fiber. It consumes time but good for our health.

Cleaning process:


  • Take a fresh banana flower and peel the outer part and take the florets from it.
  • Remove the pistil and calyx from the floret first collect all the flower and clean with this process.


  • Then chopp it with the knife and drop it in the buttermilk. If you don't have buttermilk also no problem , Take a bowl of rice water(Collect the water while cleaning the rice for cooking) add turmeric powder in it and drop the chopped florets.
  • After removing all the over layer you can see the white bud in which you can't remove the outer layer, this is also eatable part so you can chopp it directly. 
  • That's all we have now cleaned the flower. 

Monday, 19 September 2016

How to clean the residue stains in aluminium vessels

How to clean the residue stains in aluminium vessels:

 Hope every one will be searching for this stain removing technique. It is easy to clean the residue stains in the aluminium vessels. When we use aluminum kadai for deep frying purpose the oil will leak over the edges and make the vessels to look black. Now it is easy to clean the vessels using simple ingredients which we use in our home.
Wash it with normal detergent . Any kind of detergent can be used.
Apply vinegar and gently rub with the scrubber.You can see the difference after cleaning with the vinegar. You can also use lemon instead of vinegar. But vinegar sounds better than lemon.
Then scrub with sabeena powder so that you can obtain a clean stain free vessels.
Try this simple method in your home and let me know how it works . Thank You!!!

Wednesday, 14 September 2016

How to clean silver vessels/How to clean silver ornaments/How to clean silver utensils

How to clean silver vessels/How to clean silver ornaments/How to clean silver utensils:
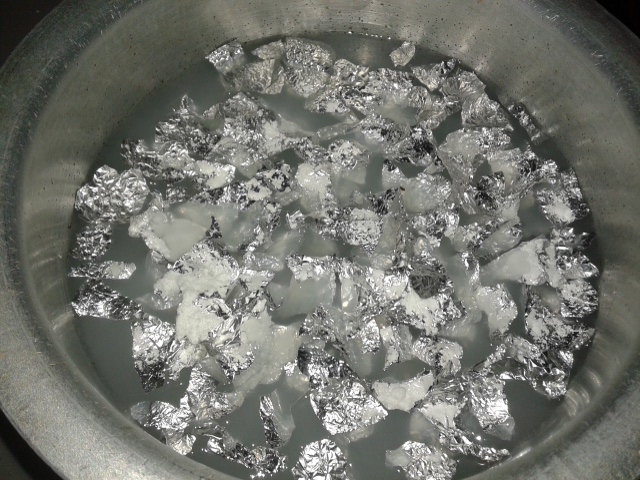
Cleaning of silver vessels and ornaments is now a easy one. I follow this method for years. Yes it works for me. You too can try this method .The thing all you need is to have aluminum foil, baking soda. This method is natural way of cleaning silver utensils and ornaments.
Make small pieces in aluminium foil . Take 1 litre of water and bring it to boiling stage. Add the pieces of aluminum foil and baking soda . Add the silver ornaments/utensils to be cleaned and immerse it fully in the water.


Switch off the stove. Let it be in for atleast 1-2 minutes.
Thats all take the vessels out and wash it with usual dish wash detergent/liquid. Your shining silver vessels will sparkle!!!

Tuesday, 13 September 2016

How to take butter and ghee from milk/How to take butter /How to take ghee

How to take butter and ghee from milk:

It is not a very tough job to take butter and ghee from milk. Once you do this process then you wont give up. Make sure that you are using a good quality milk. I use to buy cow's milk from the near by person, who gives me a nice milk with good yellow fat in it. 
Let us see how to make this process.

Boil the milk and allow it to cool. You can find the yellow layer which floats at the top of the milk. Keep under refrigeration for further process.
After 2-3 hrs take out from the fridge now you can see the yellow layer in a thick malai form. Collect this and store it in a separate container. Along with this add one spoon of curd to it.
Like wise collect this malai for one week. Better to store it in the fridge.
After one week you can get a required amount , take out from the refrigerator and wait till it reaches room temperature.


Blend it with hand blender or electric beater to get butter. If you  are using the electric beater/blender it will take few minutes to get the butter. Collect the butter with water greased hands and drop it gently in water. Again take the butter from the water and drop it to another pan containing water. 


Heat the butter in a heavy bottomed kadai in medium low flame, stir in between. The butter will slowly melts down.
wait till it get meltdown completely,then allow the butter to boil ( there will a sound when this process happens)After some time the butter becomes frothy.


Slowly the color turns to light brown ghee , You can see the residue settles at the bottom.
Now strain using a metal strainer.
That all! Now our home made ghee is ready with home made butter.


After few days the ghee will gets thick.(this is usual)


Friday, 2 September 2016

How To make Rice Flour at home / Making of Rice Flour

How To make Rice Flour at home / Making of Rice Flour:

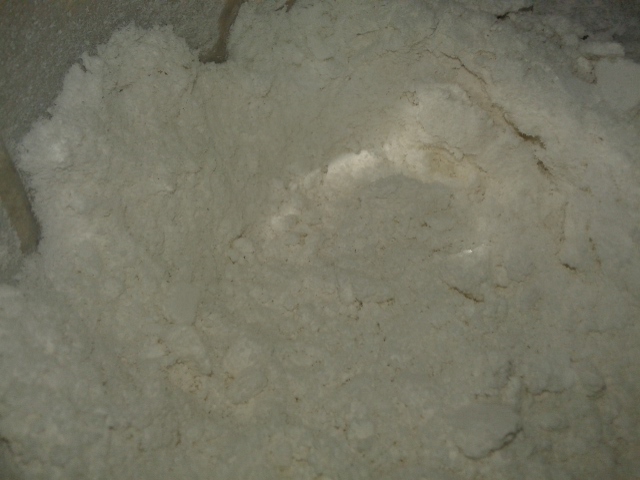
  Making Rice Flour at home is a easy job, and I Always use to make it at the home only.Simply want to grind the soaked wet rice in the mixer grinder and can be used with or without roasting the flour. For many recipes we use this rice flour as the basic ingredient. This rice flour can also be used as the binding agent for some fries. Most of our Indian snacks is done by this rice flour . Let see how to make this rice flour at home.

  • Soak raw rice for atleast 1/2 hour. Then drain the water completely and spread this rice in a towel or news paper.


  • After 15 minutes you can see all the  water drained and the rice still remains wet, at this time put the rice in the mixer grinder and grind to a fine powder and seive it to get a fine powder


  • Grind the rice in batches and repeat the grinding and seiving process for the remaining rice.

How to roast the rice flour:


  • Roasting the rice flour differs for each and every recipes.Let me explain ..
  • Take a kadai and put the rice flour in it , make sure that the flame should be in medium low flame.
  • For Puttu: Need not want to roast finely, when u find the steam coming out from the flour you can take out from the stove.
  • For Idiyappam: Want to roast the flour finely, then only you will get a smooth idiyappam otherwise you can find the flour dough coming with  intervels and the idiyappam will not be soft. Finely roast the flour till you find the flour in the sand texture, this is the right texture of the flour at this time you can take out from the flame.
  • Like wise if you are going to store it in the container then you fine roast the flour. This can be used even for puttu and other recipes.
  • Again seive the roasted flour , you can find the lumps in it, break it with hands and seive it.

  • After dry roast  and seiving put the flour in a news paper and cool it completely. Then store it in a air tight container.


Tuesday, 30 August 2016

How to make Ginger Garlic paste

How to make Ginger Garlic paste:

       Making of Ginger Garlic paste is a easy job. The only thing is peeling the skin of garlic takes time. The proportion of ginger and garlic varies for each and every dish. For non-veg recipes this ginger garlic plays a vital role for its unique flavour and taste.
        Choosing the right ginger and garlic is important for making this paste. Ginger should look fresh. You can get ginger and garlic from the vegetable market. While choosing the ginger see whether it has the mud in it and every nodes should be fresh. In case of garlic I usually don't go with the bigger ones. Since my mum use to say that smaller one has more flavour when compared to the bigger one, obviously that bigger bulb garlic is easy to peel the skin, I agree!! ,but my choice is smaller one. Some of my friends use to say that the color of the ginger garlic paste change after storing it in the fridge.
       I usually do this procedure for making ginger garlic paste and I never found my paste in different color after keeping it in the fridge. Now let us see how to make this ginger garlic paste.


Ingredients:


  1. Ginger - 1 cup(chopped)
  2. Garlic - 3/4 cup
  3. Vinegar/ Lemon - 1 tsp

Method:


  • Peel the Garlic skin and wash it in the running water.(tips: Before peeling soak this garlic for 5 minutes in water and then start peeling the skin , you can easily peel it)
  • Remove the skin from the ginger and chop it.
  • Add this ginger and garlic in the mixer and pulse it for 2-3 times.

  • Add the vinegar/Lemon and grind to a smooth paste .(Need not want to add water)
  • Store this paste in a air tight container and store in the refrigerator.

Thursday, 21 July 2016

How to take coconut milk / How to take coconut milk extract from coconut

How to take coconut milk / How to take coconut milk extract from coconut:

    Taking milk from the coconut is not a tough job. Don't ask me then why you are posting this in a blog. Many of my friends asked how to take a perfect white coconut milk using the mixer without grating the coconut. I always use to slice the coconut and grind it in the mixer for taking milk and also when ever grinding the coconut i will slice it. Ok then let us see how to get a white milk without grating the coconut.

Ingredients :


  1.  Coconut - 1
  2.  Water - as needed

Method:

Break the coconut and take out the coconut from the shell.
Before slicing the coconut remove the brown color skin at the back of the coconut which is the important thing to get white coconut milk.
Slice the coconut and grind it in the mixer grinder in pulse for 2-3 times.
Add only 1 tbsp of water and again grind it to a fine paste.
Now take a filter and put the paste and squeeze the paste to get the first milk from the coconut.

 
Take 1 cup of water and add to the coconut and filter it this is our second milk, the color of the milk would be light when compared to our first milk.
Take another cup of water and add to the coconut and again squeeze it thus our third milk is extracted. This seems to be watery when compared to our first and the second milk.
First, second and third milk from right(red bowl) to left respectively.


Raini's Recipe Book Template by Seyon Cute Designs
DISCLAIMER: All the contents and photos are edited and clicked by me. If anyone wishes to use the photos and contents please get prior permission form the author and then use it. If found stealing , will be strictly punished with penalty. Comments are welcome but spam and comments that seems to hurt any one will be deleted without any prior information.